Update Aug 28th: The BOM for all variants is now on Github. Please see the notes at the end if you want to build a Commadorable 64 yourself.
The ILI9341 based QVGA displays found on eBay for €4 are well suited for making small screenlets telling the current temperature, weather forecasts, traffic situation to work and spreading them over the house. As PCB design is both fun, cheap and rewarding I did a custom PCB for these tiny displays. Actually, I made three, one for each of the 2.2″, 2.4″ and 2.8″ screens. The 2.8″ version has not been produced but the smaller variant have and work well. From 2.4″ and onwards there is (untested) touch support on the screen modules.
The “Hello World” application for this project also named the PCBs. I call them Commadorable 64. Here is why:
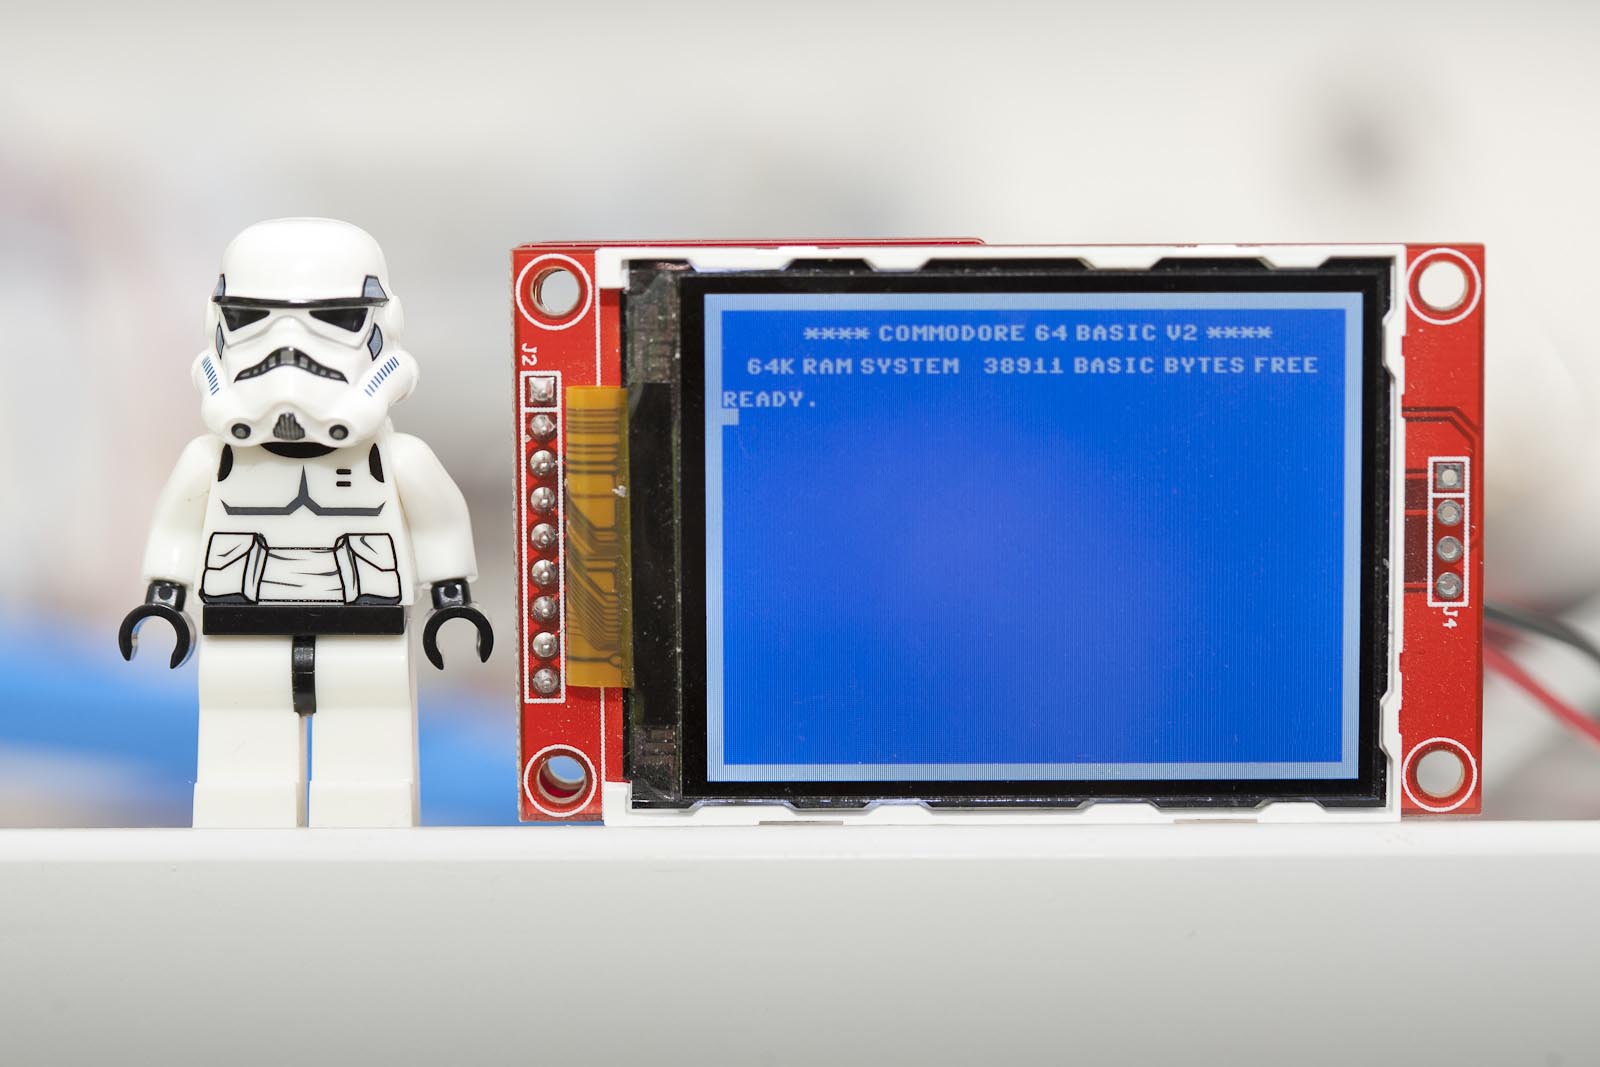
The cursor blinks but I resisted the urge to create an animated GIF. “Commadorable 64” is a play with “Commodore 64” and “adorable”. It has been scientifically proven that those for whom the Commodore 64 played a significant part of their childhood will look at the 2.2″ version of the C64 start screen and react the same way as cat people looking at kittens. Heads will be tilted slightly sideways, smiles appear and sounds like “naaaaaaaw” will be heard. I have one of these at work and depending on childhood experiences people will either go “what?” or “naaaaaaw”.
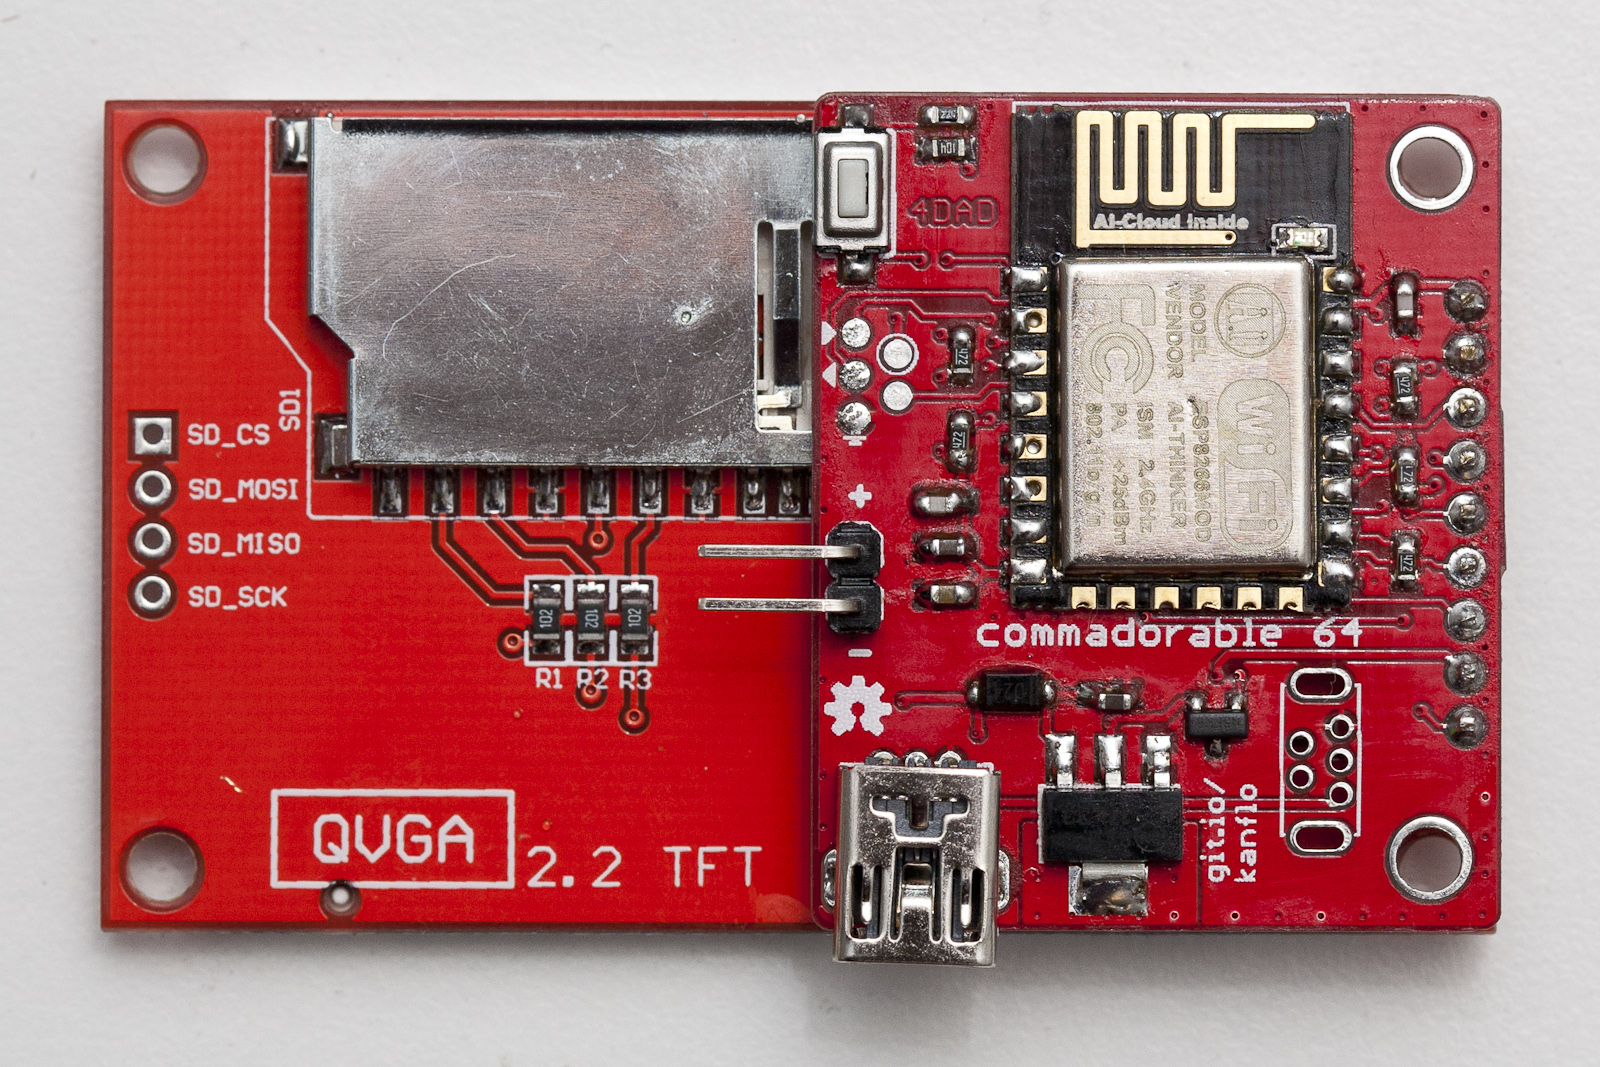
The PCB is soldered directly to the pins of the ILI9341 module. Some of these screens will probably end up in other applications in the future. The other day I read about openframe.io and adding support for these would be fun.
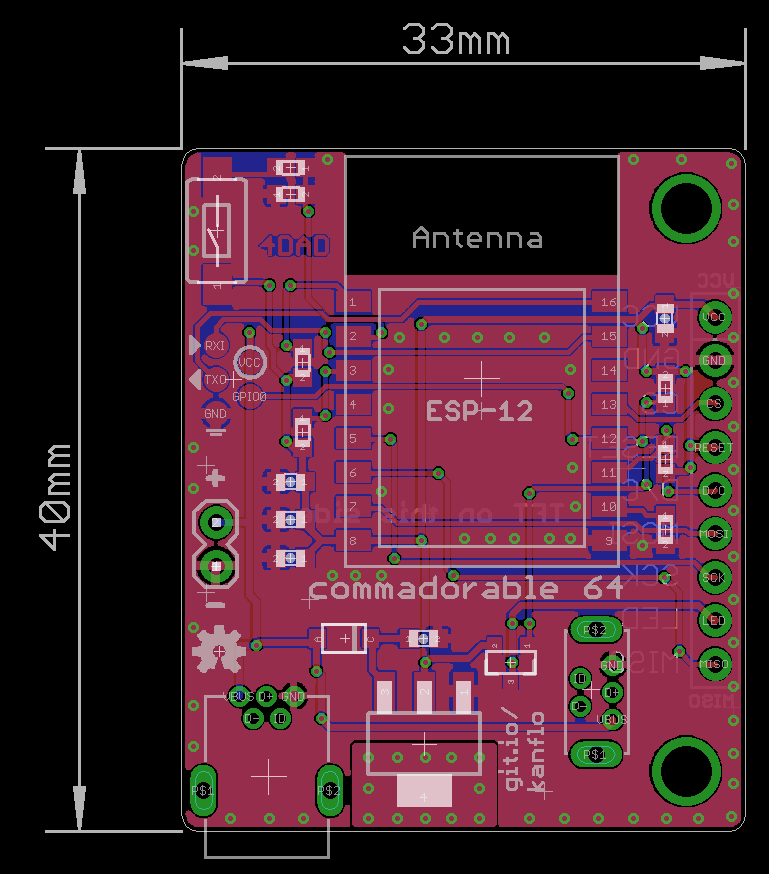
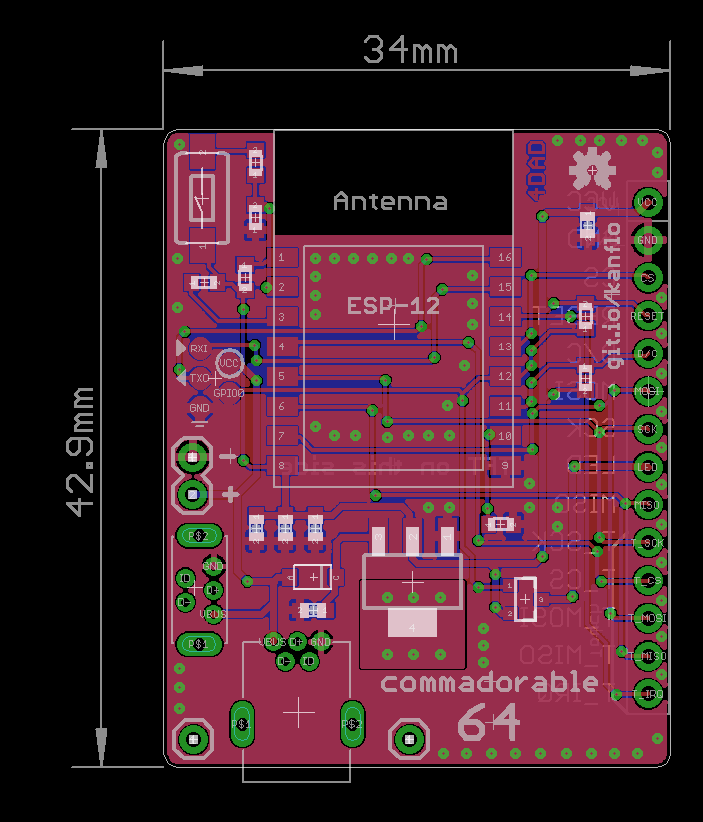
The PCBs can be ordered from DirtyPCBs.com, 2.2″ with a bonus AAduino and 2.4″ version with touch. The BOM consists of the usual components for my ESP8266 designs. We have 0603 resistors and capacitors, a 3x6x2.5mm momentary push button [eBay] for displaying the IP address, a SOT23-3 P-mosfet to control the backlight, an LM1117 voltage regulator and a SOD-123FL schottky diode for reverse power protection and optional mini USB connectors. The PCB can be powered in three different ways depending on personal preference (well, four including the esprog interface). There are footprints for normal [eBay] and vertical [eBay] mini USB connectors, depending on if the module is to stand on a table or hang from a wall (Eagle parts available on Github). In addition there is a 0.1″ header for power. All power paths are protected by the diode.
Further update Aug 28th. I see some 20+ orders on DirtyPCBs for both Commadorable 64 variants which is great fun and I would really love to hear what you will build. I have some recommendations you might find useful. I have received a few broken ESP-12e/f modules on eBay over time and one broken ILI9341 module. Because of that I always try the modules before soldering them using my Esparducam board with the ESP Pinlet add on board. When a module passes testing I flash it with the ESP Open RTOS OTA basic demo meaning I can OTA any device directly after soldering. Also, you will note there is no FTDI connector on these boards, the reason is described here. As UART output is still useful, I have one “development” variant with leads from an FTDI connector soldered to the GND/RXI/TXO esprog pads. Oh, and I also have one Commadorable 64 board with a female header for testing the ILI9341 modules before soldering them. If you have any questions about building the boards, sound off in the comments below.
Code and schematics on Github, as always.