The FTDI connector can be found on just about any ESP8266 design. If you are building a gadget to be deployed somewhere and not a full blown development board, the FTDI connector is somewhat overkill. And it is quite large. A few pins could be shaved off but we still have a through hole connector invading the other side of the PCB.
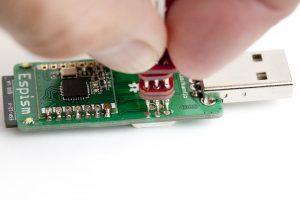
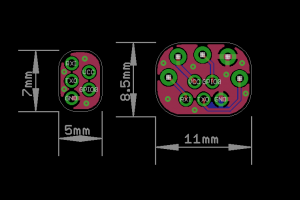
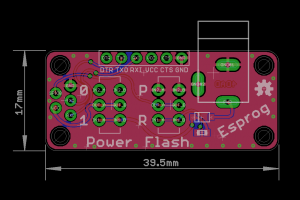
I ended up designing my own connector and it has been used sucessfully in all of my recent projects. The connector consists of five test points providing power, GND, TXO, RXI and GPIO0 for boot control. It takes very little single sided PCB space and is inspired by the TagConnect I use at work. Note that the power provided through the connector is unregulated.
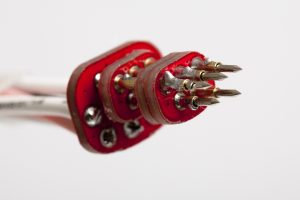
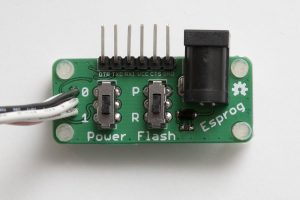
I also designed a pogo pin connector to mate the test points and a small board with a DC barrel connector and the FTDI connector. This board has two switches for power and boot mode selection.
If you look carefully on the pogo pin adapter you see that the power pin is somewhat retracted. As the adapter will be hand held, the four other pins can be aligned to the device and with a gentle push power will be applied.
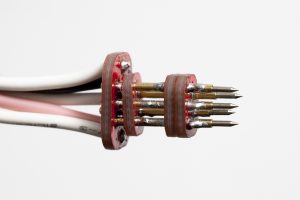
The pins used are P75-B1 1.02 mm (40 mil) [eBay] and the 9x4x8.5mm 3 way switches are also on eBay.
Schematics and my Eagle library with the device connector (“ESPROG-DEVICE”) as always on Github.
Pingback: Factory programming ESP8266 gadgets - Electronics-Lab
Pingback: The Commadorable 64 – Johan Kanflo
Pingback: RFM69 WIFI Gateway | Tinkerman
Pingback: Cheap wireless display – TechniGEM
Pingback: Ecran sans-fil économique à base d’ESP8266 – TechniGEM